#!/bin/bash#    Setup Simple PPTP VPN server for CentOS 7 on Host1plus#    Copyright (C) 2015-2016 Danyl Zhang <1475811550@qq.com> and contributors#
#    This program is free software; you can redistribute it and/or modify#    it under the terms of the GNU General Public License as published by#    the Free Software Foundation; either version 2 of the License, or#    (at your option) any later version.#
#    This program is distributed in the hope that it will be useful,#    but WITHOUT ANY WARRANTY; without even the implied warranty of#    MERCHANTABILITY or FITNESS FOR A PARTICULAR PURPOSE.  See the#    GNU General Public License for more details.printhelp() {

echo "Usage: ./CentOS7-pptp-host1plus.sh [OPTION]
If you are using custom password , Make sure its more than 8 characters. Otherwise it will generate random password for you.
If you trying set password only. It will generate Default user with Random password.
example: ./CentOS7-pptp-host1plus.sh -u myusr -p mypass
Use without parameter [ ./CentOS7-pptp-host1plus.sh ] to use default username and Random password
  -u,    --username             Enter the Username
  -p,    --password             Enter the Password"}while [ "$1" != "" ]; do
  case "$1" in
    -u    | --username )             NAME=$2; shift 2 ;;    -p    | --password )             PASS=$2; shift 2 ;;    -h    | --help )            echo "$(printhelp)"; exit; shift; break ;;
  esac
done# Check if user is root[ $(id -u) != "0" ] && { echo -e "\033[31mError: You must be root to run this script\033[0m"; exit 1; }

export PATH=/usr/local/sbin:/usr/local/bin:/sbin:/bin:/usr/sbin:/usr/bin
clear

yum -y update
yum -y install epel-release
yum -y install firewalld net-tools curl ppp pptpd

echo 'net.ipv4.ip_forward = 1' >> /etc/sysctl.conf
sysctl -p#no liI10oO chars in passwordLEN=$(echo ${#PASS})if [ -z "$PASS" ] || [ $LEN -lt 8 ] || [ -z "$NAME"]
then
   P1=`cat /dev/urandom | tr -cd abcdefghjkmnpqrstuvwxyzABCDEFGHJKLMNPQRSTUVWXYZ23456789 | head -c 3`
   P2=`cat /dev/urandom | tr -cd abcdefghjkmnpqrstuvwxyzABCDEFGHJKLMNPQRSTUVWXYZ23456789 | head -c 3`
   P3=`cat /dev/urandom | tr -cd abcdefghjkmnpqrstuvwxyzABCDEFGHJKLMNPQRSTUVWXYZ23456789 | head -c 3`
   PASS="$P1-$P2-$P3"fiif [ -z "$NAME" ]
then
   NAME="vpn"fi

cat >> /etc/ppp/chap-secrets <<END$NAME pptpd $PASS *ENDcat >/etc/pptpd.conf <<ENDoption /etc/ppp/options.pptpd#logwtmplocalip 192.168.2.1remoteip 192.168.2.10-100ENDcat >/etc/ppp/options.pptpd <<ENDname pptpd
refuse-pap
refuse-chap
refuse-mschap
require-mschap-v2
require-mppe-128ms-dns 8.8.8.8ms-dns 209.244.0.3proxyarp
lock
nobsdcomp
novj
novjccomp
nologfdENDETH=`route | grep default | awk '{print $NF}'`

systemctl restart firewalld.service
systemctl enable firewalld.service
firewall-cmd --set-default-zone=public
firewall-cmd --add-interface=$ETHfirewall-cmd --add-port=22/tcp --permanent
firewall-cmd --add-port=1723/tcp --permanent
firewall-cmd --add-masquerade --permanent
firewall-cmd --permanent --direct --add-rule ipv4 filter INPUT 0 -i $ETH -p gre -j ACCEPT
firewall-cmd --reload

cat > /etc/ppp/ip-up.local << END/sbin/ifconfig $1 mtu 1400ENDchmod +x /etc/ppp/ip-up.local
systemctl restart pptpd.service
systemctl enable pptpd.service

VPN_IP=`curl ipv4.icanhazip.com`
clear
echo -e "You can now connect to your VPN via your external IP \033[32m${VPN_IP}\033[0m"echo -e "Username: \033[32m${NAME}\033[0m"echo -e "Password: \033[32m${PASS}\033[0m"
wget http://files.cnblogs.com/files/wangbin/vpn_centos.sh
chmod +x ./vpn_centos.sh
./vpn_centos.sh
可在-u、-p后随意更改自己的登录用户名和密码。但密码长度必须大于8个 ASCII字符,否则为了安全,脚本将会随机生成密码。
注:
如果你无法访问一些特定网站,建议你修改ppp接口的MTU(很多时候能连接vpn但是无法打开某些网页也可能跟这个有关系)
输入vi /etc/ppp/ip-up
在倒数第二行加入如下内容:/sbin/ifconfig $1 mtu 1400
缺省 MTU:1496
保存后需要重启PPTP服务器,指令如下: systemctl restart pptpd
发表于: | 分类: 技术积累 | 标签: Linux Centos7 VPN | 评论: 27 | 阅读: 11143
PPTP点对点隧道协议(PPTP,Point-to-Point Tunneling Protocol)是一种协议(一套通信规则),它允许企业通过私人“隧道”在公共网络上扩展自己的企业网络。注意:苹果手机从ios10起不支持pptp vpn了
PPTP以通用路由封装(GRE)协议向对方作一般的点对点传输。通过TCP1723端口来发起和管理GRE状态。因为PPTP需要2个网络状态,因此会对穿越防火墙造成困难。很多防火墙不能完整地传递连接,导致无法连接。 在Windows或Mac OS平台,通常PPTP可搭配MSCHAP-v2或EAP-TLS进行身份验证 ,也可配合微软点对点加密(MPPE)进行连接时的加密。
搭建清单:
Centos7 (我这里使用腾讯云的服务器)
ppp和pptpd 包
iptables (我这里使用iptables)
win10客户端(连接测试使用)
1、查看是否支持
[root@VM_centos ~]# modprobe ppp-compress-18 && echo yesyes[root@VM_centos ~]# cat /dev/pppcat: /dev/ppp: 没有那个设备或地址
2、禁用firewalld防火墙和安装需要的包
#停止和禁用firewalld[root@VM_centos ~]# systemctl stop firewalld[root@VM_centos ~]# systemctl disable firewalld#增加epel yum源[root@VM_centos ~]# yum install epel-release -y#安装需要的包[root@VM_centos ~]# yum install ppp ppp-devel pptpd iptables iptables-services -y
3、修改配置文件pptpd.conf option.pptpd
[root@VM_centos ~]# vim /etc/pptpd.conf#找到此处去掉前面注释localip xxx.xxx.xxx.xxx  #内网ip地址(云服务器的eth0网卡地址,不是服务器公网地址)remoteip 192.168.0.10-20  #自定义分配给客户端的网段[root@VM_centos ~]# vim /etc/ppp/options.pptpd#修改成下面的参数name pptpd
refuse-pap
refuse-chap
refuse-mschaprequire-mschap-v2require-mppe-128ms-dns 8.8.8.8ms-dns 114.114.114.114proxyarp
lock
nobsdcomp
novj
novjccomp
nologfd
logfile /var/log/pptpd.log
4、修改用户认证配置文件chap-secrets
[root@VM_centos ~]# vim /etc/ppp/chap-secrets#添加用户格式:用户名 pptpd 密码 *# Secrets for authentication using CHAP# client server secret IP addressestest pptpd 123456 *
5、打开系统ipv4转发 sysctl.conf
[root@VM_centos ~]# vim /etc/sysctl.conf#有此项的话修改数值为1 没有的新添加一条net.ipv4.ip_forward=1#应用生效[root@VM_centos ~]# sysctl -p
6、启动pptpd服务
[root@VM_centos ~]# systemctl start pptpd
7、开放需要的端口(iptables和云服务器的安全组),此步操作完就可以先测试下是否可以连接了
iptables -A INPUT -i lo -j ACCEPTiptables -A INPUT -m state --state ESTABLISHED -j ACCEPTiptables -A INPUT -p icmp -m icmp --icmp-type 8 -j ACCEPTiptables -A INPUT -p tcp --dport 22 -j ACCEPTiptables -A INPUT -p tcp --dport 80 -j ACCEPT iptables -A INPUT -p tcp --dport 443 -j ACCEPT iptables -A INPUT -p tcp --dport 1723 -j ACCEPTiptables -A INPUT -p gre -j ACCEPT#保存规则[root@VM_centos ~]# service iptables save#重启生效[root@VM_centos ~]# systemctl restart iptables

8、增加转发规则,和修改mtu的大小,为了可以连上vpn后上网
#注意这里网段和上面配置文件网段一致,eth0和本机网卡名称一致(本机只有eth0和lo)[root@VM_centos ~]# iptables -t nat -A POSTROUTING -s 192.168.0.0/24 -o eth0 -j MASQUERADE#保存规则[root@VM_centos ~]# service iptables save#重启生效[root@VM_centos ~]# systemctl restart iptables#修改MTU默认值1396为1500,在exit 0前面加一句[root@VM_centos ~]# vim /etc/ppp/ip-up.......ifconfig $1 mtu 1500exit 0#重启下pptpd服务[root@VM_centos ~]# systemctl restart pptpd

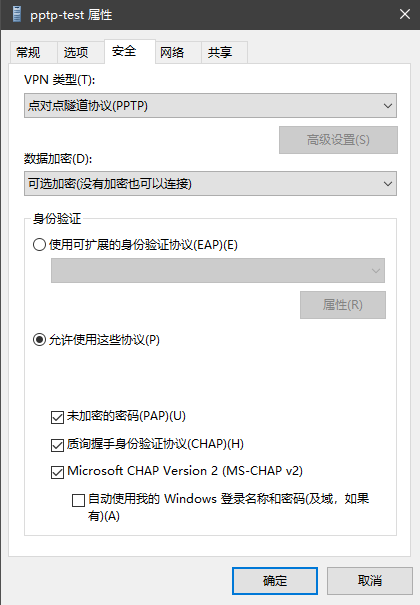
9、win10客户端连接测试(连接后所有上网流量都通过vpn服务器)
win10客户端pptp vpn主要配置参数
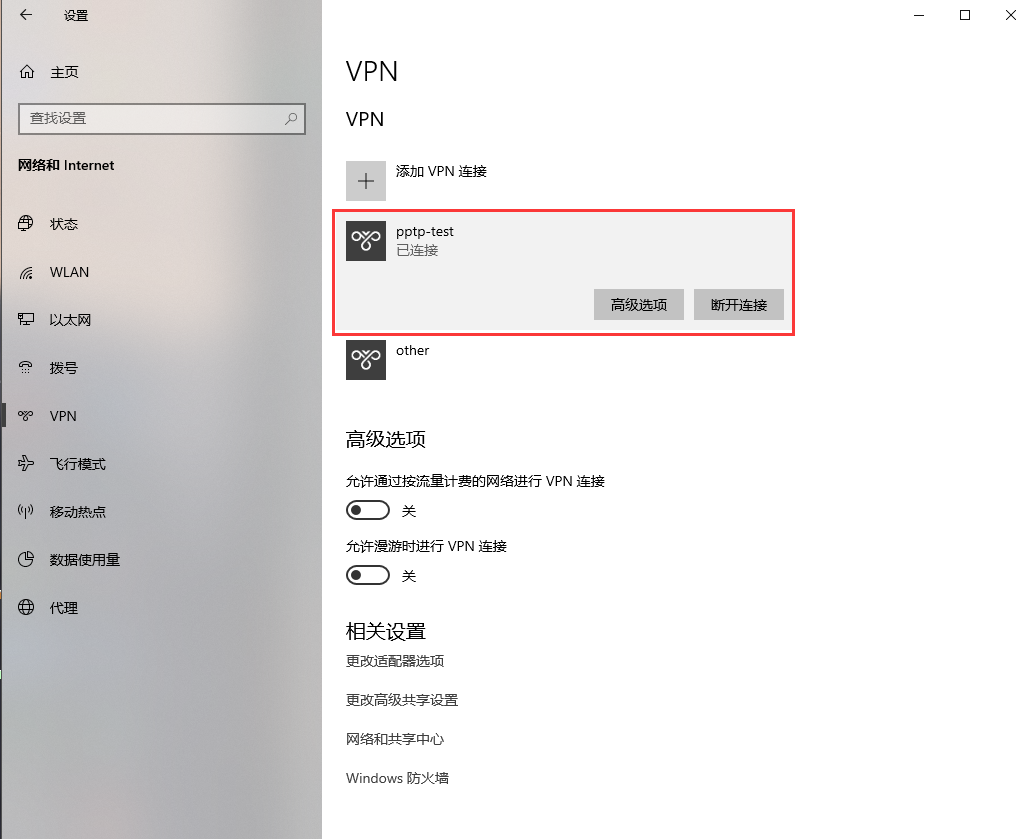
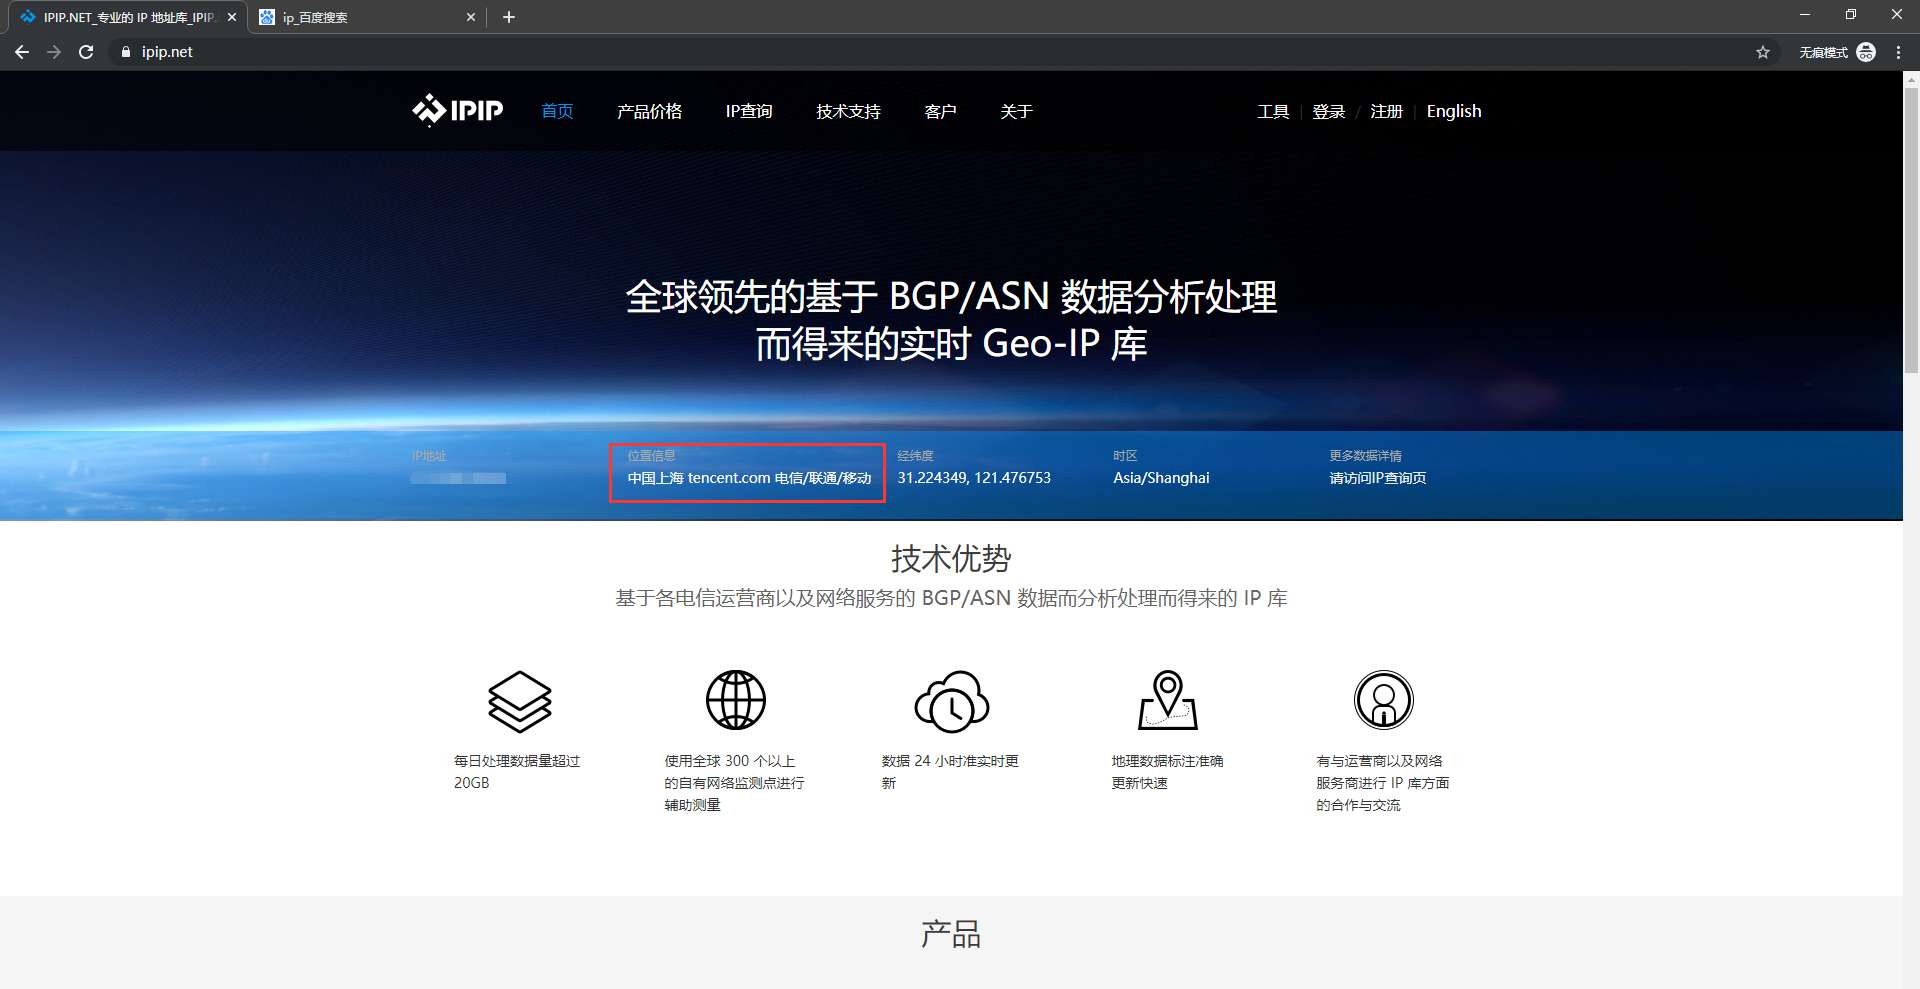
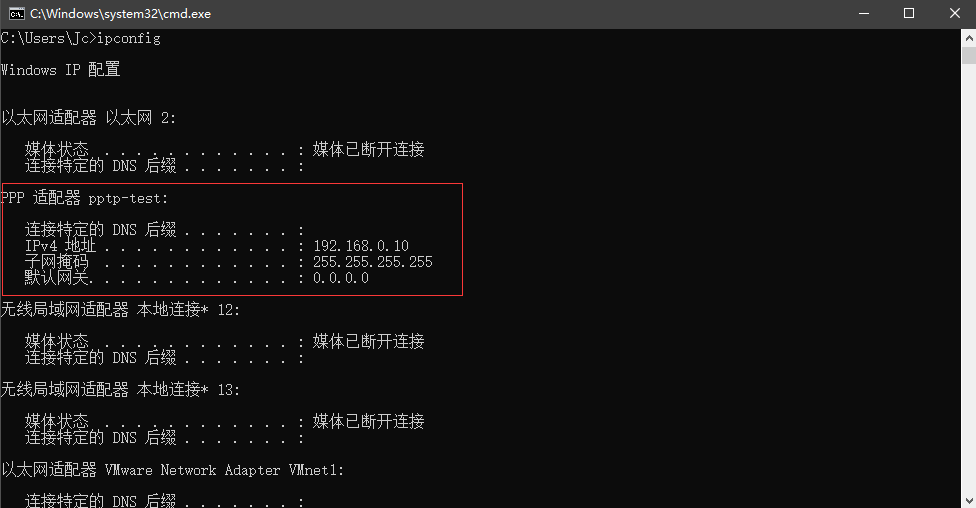
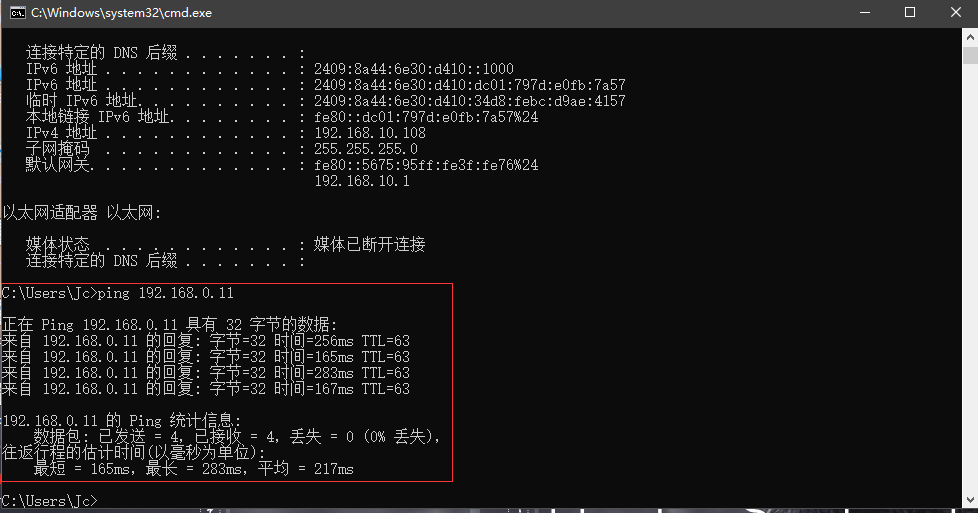
win10客户端连接后的信息,上公网和访问内网机器

10、(2020.6.16更新)如果想用本地网络上网,又可以访问连接vpn服务器的网络(连接后上网流量还是通过本地网络)


